Overview
In this post, we are going to take a look on how to use template to our express js application, in this post we are going to focus on using Pug template to our application.
If you have not yet read previous blog posts on Node, please take a look on it as this post is in continuation with previous blog posts.
http://zenconix.com/create-node-app-with-express-js/
http://zenconix.com/create-routes-in-express-js/
First step, we need to install pug plugin to our application, to install it, open terminal and enter command as
npm install pug --saveDetailed information about pug js can be found on their official website – https://pugjs.org/api/getting-started.html
Next, we need to tell our express application that, we are going to use pug as view engine, open app.js file and write below code there
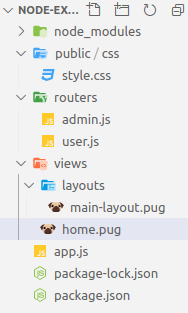
app.set('view engine', 'pug');We are going to create all views of our application into Views folder, so create folder named – views in root folder of our application.
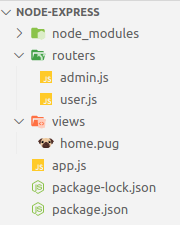
Inside views folder , we have created view for home page by name “home.pug”
We will back to our home view in minute, but before that, we need to tell our express application that, it has to use this “views” folder to find out the view for rendering. So go back to app.js file and tell our application, that it has to use “views” folder to find out the views.
app.set('views', 'views'); Here we are using set function of middleware, all information about it can be found on Express Js website – https://expressjs.com/en/4x/api.html#app.set
Now, we will create new router for home page, where we have to render home.pug file as response of the request.
Create new router for home in user.js file.
router.get('/home', (req, res, next) => {
    res.render('home');
 });
Notice here, we are using render() function to call home view without extension of file i.e. pug.
Now, go back to our home.pug file and write down the code as below.
html
  head
    title HomePage
  body
    h1 welcome to home page
In pug, we dont need to open and close the tags, we just need to write them once and enter text whatever you want to add beside the tags.
Syntax of pug file can be found at their website – https://pugjs.org
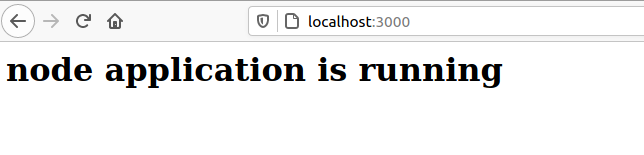
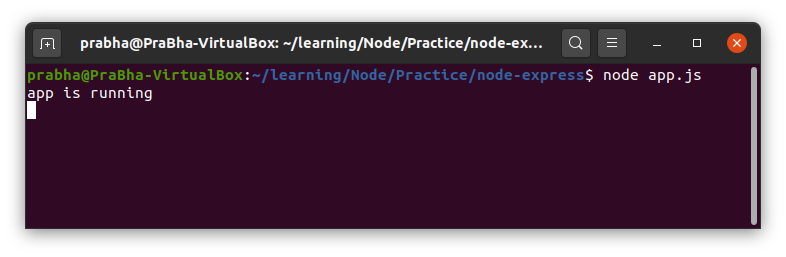
Time to check our application, open terminal and start our application.
npm startRemember, we have already installed and configured nodemon in our application, if you have not yet done, please go through blog post https://zenconix.com/use-nodemon-in-node-app/
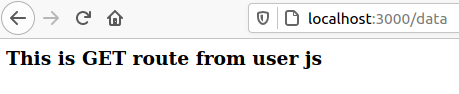
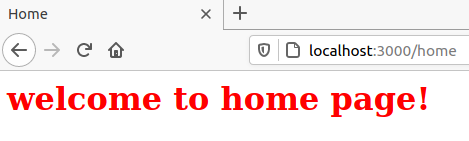
After you run application, go to url http://localhost:3000/home

and if you see its source code, it is same as our normal HTML, pug engine does everything for us.

We also can make our HTML page dynamic by passing the values from js file. Let’s pass title of the page and message to print on the page from our router file.
Modify our response as below.
router.get('/home', (req, res, next) => {
    res.render('home',
        {
            pageTitle: 'Home',
            pageMessage: 'welcome to home page!'
        });
 });
Here, we are passing title and message to home view, modify our Home.pug file as below
html
  head
    title=pageTitle
  body
    h1=pageMessage
now if we check our application, we will see the result as expected

Add CSS to our application
Now, we will add CSS to our application, but before doing that, we need to create a folder in our application which will be exposed to end user to access, in that folder we will store all files which are accessible to all user.
Let’s create a folder named “Public” in our application, inside public, create another folder called “css” where we will keep all our css files. Finally, create css file – style.css

We need to follow couple of steps here to add css file to our application.
First, we need to tell our application to allow our public folder to access to users, so css file and other files inside it (example images and videos etc) will be accessible to users.
We will use core module of node i.e. path, to use path module, add following line in our app.js
const path = require('path');Now, we have one variable in node which gives us directory name, i.e. __dirname
Now, tell our node app to allow all user to access public, write below code in app.js file
app.use(express.static(path.join(__dirname, 'public'))); express.static() function will allow user to access public folder which is inside our directory (directory name will be fetched by __dirname
Time to add css file reference in home.pug file, add following line in home.pug
link(rel="stylesheet", href="/css/style.css")Remember one thing, indentation in pug file is very important, if you missed to indent it properly, there will be run time error or unexpected result. Now our home.pug file will look like below.
html
head
title=pageTitle
link(rel="stylesheet", href="/css/style.css")
body
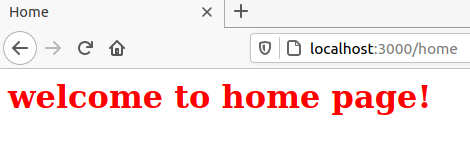
h1=pageMessageFor simplicity , I just added one line of css to style.css file
h1{
    color:red;
}
Save the file, go to browser and go to home router http://localhost:3000/home
Add Common Layout to application
Now we are going to create common layout for our views.
Create new folder named “layout” inside the views folder and create a layout named main-layout.pug (you can give any name you want)
now move common code from home.pug to main-layout.pug file, so our main-layout.pug file would be as below.
html
  head
    title=pageTitle
    link(rel="stylesheet", href="/css/style.css")
  body
  block content
Note; I have just moved common code and code which is uncommon (code which will be vary from file to file) will be a part of block, for now, I have added block name content, you can give any name to block, example block uncommon-area
Now, open our home.pug file and add reference of main-layout.pug file there and rest of our content.
extends layouts/main-layout.pug
block content
    h1=pageMessage
Save and refresh the browser, you will see result as expected.